Ram raiding Photoshop
This week was all about work, work, work. The majority of Wednesday was taken up with creating content for the A3 project. I had grossly underestimated how long it would take for me to do this, so as well as doing it all day; I spent a good part of the evening finishing off content.
As I had forgotten to save my image compression essay onto my flash drive, I now have this to finish off. It was frustrating that I could not finish this off, so I will have to time plan to do this sometime for this week. I still managed to fill up my study time with reading through my sketchpad, and gathering inspirational pieces, so maybe this was a blessing in disguise.
On Wednesday morning we had a lecture on typography. I found this very interesting, as a lot of the terminology I had come across in InDesign and Photoshop. A lot of the conventions, like only using display fonts for titles and headlines were common sense. Aspects such as the different width fonts that could be used were new to me, and I will be using these for the coming projects.
On Thursday we started, at last, to use Photoshop. Our task was to repair a damaged photograph, and Steve gave us some pointers on where to start. Interestingly, he did not recommend using new layers for each part of the picture when it came to colouring. This is not how I would have approached it, because I think that using more layers does allow you to readjust or even delete things if they go wrong. I understand that it reduces the file size, but .psd files are always substantially larger than their output files anyway. That’s just my two cents though, and maybe my opinion will alter as I become better at this new artistic approach to Photoshop. My efforts, as they stand now, can be seen below.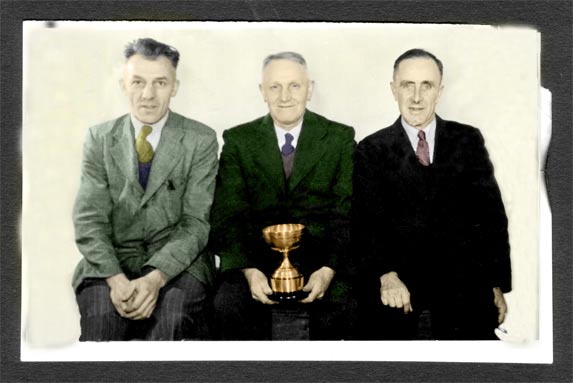
Throughout the day I enjoyed working with Photoshop, but also enjoyed discussing the progress with my colleagues. As I am currently making an unrelated tutorial on using Photoshop, it gave me an insight into what problems people come across when using Photoshop. These are usually simple things such as trying to edit something when the marquee box is still present on screen, or having the wrong layer selected.
For self study this week, I will be finishing off my compression essay, and working on my Photoshop picture. I am going to see if using my graphics tablet makes it any easier to use (if I can find any spare USB sockets that is) and I will also try changing the levels setting. I think this is the key to creating a good restoration, as I found mine was too dark and therefore lacked detail. I believe if you get this right, then you restoration will be a lot better.
![]()
4 comments:
If you're going to fiddle with the levels, on reflection, it may be better to do it on an 'adjustment layer' [the black and white halved circle at the bottom of the layers palette]. It's the same principle as your technique of working on separate layers for the hand-tining effect - it doesn't alter the underlying image.
Thanks Steve, I will give this a try when I have some time. I think that keeping an image as adjustable as possible is the key, because you never know when you might have to change something fundamental when it either goes wrong, or a clietn asks for something to be changed.
I think it is best practice to be prepared for this. Would you agree?
I must admit, I started working without layers and as soon as I hit a problem, I found I was stuck.
I'd definitely agree Julian, the more layers the better.
I've used 3 layers for the task. My original image layer, a 'colour' layer for the men themselves (with the original to refer back to, to see if I've gone over anything accidently, and a 'background' layer (for the background, obviously). I put it behind my colour layer and found it to be the easiet way (instead of trying to go around the men).
Post a Comment